Refinishing Engineered Hardwood – Limitations Guide
Refinishing engineered hardwood can breathe new life into your flooring, but it’s essential to understand its limitations. Unlike solid hardwood, engineered hardwood features a wear layer thickness that affects how much sanding you can safely do. This guide covers practical sanding methods, important points for Bruce hardwood, and the specific difficulties in refinishing. Learn how to get the best out of your hardwood flooring and steer clear of common mistakes.
Key Takeaways:
Contents
- Understanding Limitations
- Common Refinishing Methods
- Limitations of Sanding
- Limitations of Screening
- Limitations Based on Floor Condition
- Environmental Considerations
- Engineered Hardwood Refinishing Data
- Frequently Asked Questions
- What is engineered hardwood?
- Can engineered hardwood be refinished?
- What are the limitations of refinishing engineered hardwood?
- How do I know if my engineered hardwood can be refinished?
- What are the alternatives to refinishing engineered hardwood?
- How can I extend the lifespan of my engineered hardwood?
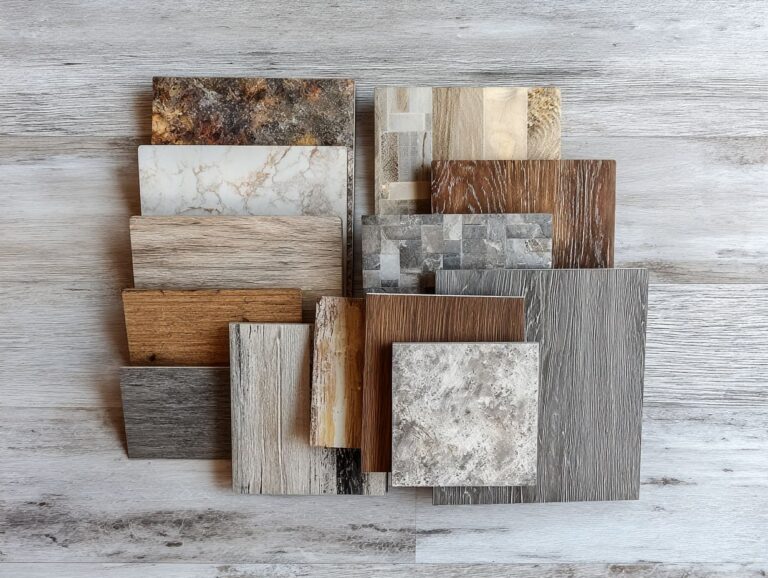
Definition of Engineered Hardwood

Engineered hardwood consists of a top layer of real wood veneer bonded to layers of high-density fiberboard for superior stability and moisture resistance.
This construction makes engineered hardwood less prone to warping and cracking compared to solid hardwood, especially in environments with fluctuating humidity.
For example, while solid hardwood can expand and contract, engineered wood remains steady, making it ideal for basements or over radiant heating systems.
Installation is easier, as many varieties come with click-lock technology, allowing for a floating floor setup. This durability improves the look and gives lasting benefits, since they usually last longer than solid hardwood in damp environments. For maintenance, see also our seasonal flooring maintenance checklist for tips on keeping your engineered hardwood in top condition.
Importance of Refinishing
Sanding and refinishing engineered hardwood floors makes them look better and extends their life, which is a key part of maintaining your floors.
Regular refinishing makes your floors look new again by removing scratches and reducing dullness, improving the look of your space. It protects the flooring by adding a fresh layer of polyurethane, increasing its resistance to wear and tear.
For instance, investing in a professional refinishing service can typically range from $2 to $5 per square foot, significantly improving the property’s value.
To keep floors in good condition, homeowners should refinish them every 3 to 5 years.
Understanding Limitations
Knowing the limits of engineered hardwood is important for successful refinishing and preventing possible harm. If you’re interested in understanding more about how physical characteristics like material thickness can impact refinishing, you might find our Hardwood Floor Thickness Guide insightful.
Thickness of the Wear Layer
The wear layer thickness of engineered hardwood typically ranges from 0.6mm to 6mm, directly impacting refinishing options.
A thin wear layer, like 0.6mm, can only handle light sanding, so refinishing is rarely possible. A 3mm layer can be sanded down and polished one or two times.
Conversely, a 6mm wear layer provides the most flexibility, accommodating multiple sandings throughout its lifespan.
Flooring with a 4mm wear layer, like many mid-range engineered products, strikes a balance, permitting light refinishing.
When choosing flooring, consider how long you plan to keep it. Choosing a thicker wear layer helps keep the floor looking good for a longer period.
Type of Finish Used
Different finishes like polyurethane, lacquer, and oil can influence the refinishing process and final appearance of engineered hardwood.
Polyurethane provides a durable, water-resistant layer that’s ideal for high-traffic areas, but it can appear plastic-like. To better understand how water-based and oil-based options can affect your choice, consider the differences between these polyurethane finishes.
Lacquer dries fast and gives a shiny finish that makes the wood grain stand out, but it might need to be applied again more often.
Oil finishes penetrate the wood, giving a natural look and feel, but they offer less protection and need regular maintenance.
When selecting a finish, think about how the room is used, how you want it to look, and how you will care for it over time to get the best results for your flooring.
Age of the Flooring
The age of engineered hardwood can greatly impact its state and whether it can be refinished, often needing specific methods.
-
For floors under 10 years old, refinishing generally means sanding the surface and applying a new finish.
-
For older installations, consider factors like wear patterns and potential water damage. For instance, if your flooring is over 15 years old and shows signs of deep scratches or discoloration, a more extensive process may be necessary, including deeper sanding or even replacing boards.
It’s advisable to consult a professional to assess the specific needs of your flooring, ensuring you achieve the best results while preserving its integrity.
Common Refinishing Methods
Learning different refinishing techniques can improve outcomes and make engineered hardwood floors last longer. For comprehensive guidance, explore the various tools and steps involved in DIY floor refinishing to ensure your flooring investment stands the test of time.
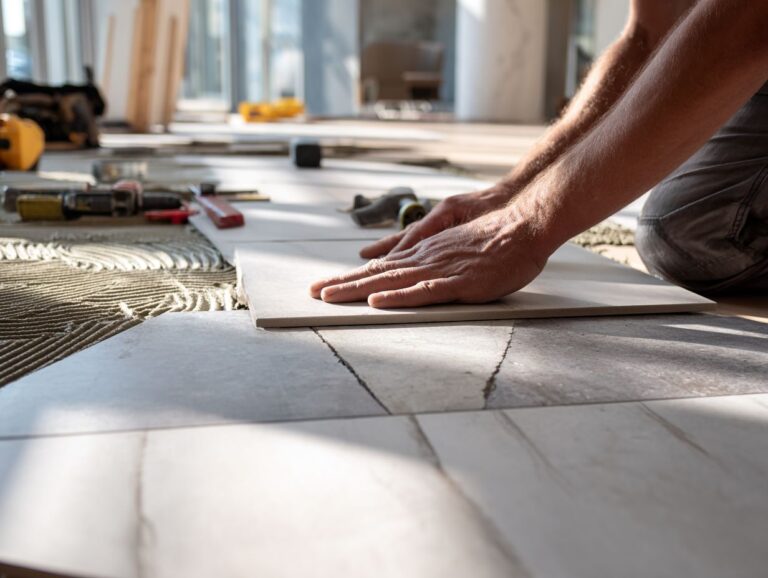
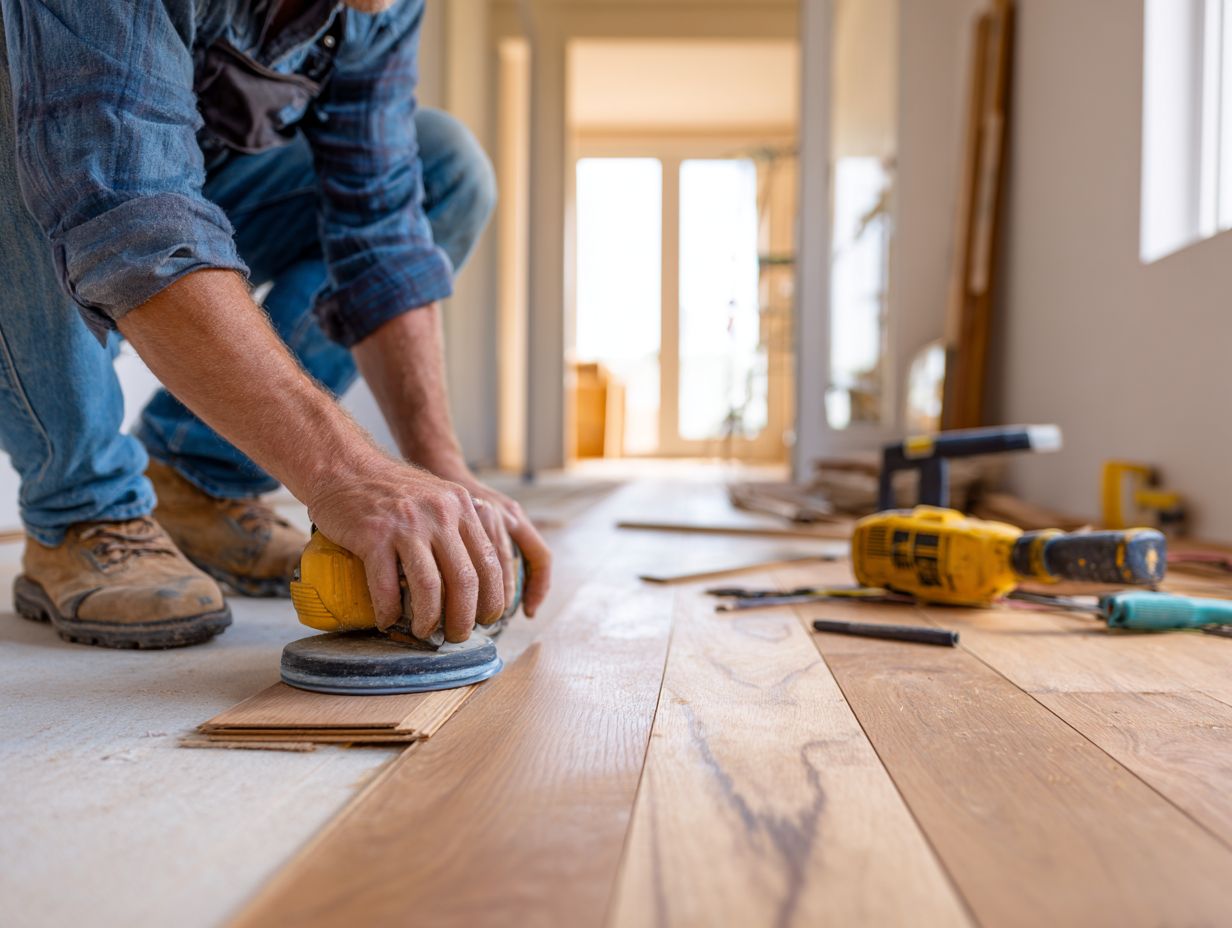
Sanding
Sanding is a popular method for refinishing which requires specific tools like drum sanders and careful attention to dust control practices.
To begin sanding, you will need different sandpaper types (80, 120, and 220 grit), a random orbital sander for quicker work, and a vacuum system or dust mask for protection.
Begin with coarser sandpaper to remove old finishes, and gradually switch to finer grits for a smooth surface. If you prefer professional results, consider renting a drum sander, which is perfect for larger areas.
Always wear safety gear to avoid breathing in dust and make sure your workspace has good airflow.
Screening

Screening is a milder method that preserves the surface finish without sanding all the way to the bare wood, making it good for minor damage.
- To execute screening effectively, start by cleaning the surface with a damp cloth to remove dust and debris.
- Next, use a 120-grit sanding screen attached to a floor buffer or a hand-held sanding block for smaller areas.
Make sure to apply even pressure while moving in the direction of the grain. This method is great for floors that have lost their shine but aren’t deeply scratched. It lets you refresh the surface without needing to do a full sanding, which saves time.
After screening, apply a fresh coat of finish for optimal results.
Coating with New Finish
Adding a fresh layer of finish can greatly improve the appearance of your engineered hardwood floors and help shield them from damage.
Start by selecting the right finish: polyurethane provides a durable, water-resistant layer, while lacquer offers a quicker drying time and a glossy appearance.
Clean the floor thoroughly and sand lightly to promote adhesion. For polyurethane, allow a drying time of 4-6 hours between coats; for lacquer, this can be as short as 30 minutes. Apply at least two coats for optimal protection.
Remember to ventilate the area; opening windows and using fans will expedite drying and reduce fumes. Choose high-quality brushes or rollers for a smooth application.
Limitations of Sanding
Sanding can refresh engineered hardwood, but there are certain limits and risks that homeowners need to be aware of.
Potential Damage to the Floor
Sanding can cause permanent damage if the wear layer is too thin or if done incorrectly, like using too much pressure.
Common mistakes include using the wrong grit sandpaper, which can scratch the surface rather than smooth it.
Opt for a sequence starting with a coarser grit (e.g., 36) and progressing to finer grits (e.g., 120). Keep your sander moving at a steady pace to prevent uneven areas. Maintain consistent speed and pressure.
Always check the thickness of the wear layer beforehand, aiming for at least 1/8 inch to maintain floor integrity.
Regularly inspect your sandpaper for wear, replacing it as needed to achieve the best results.
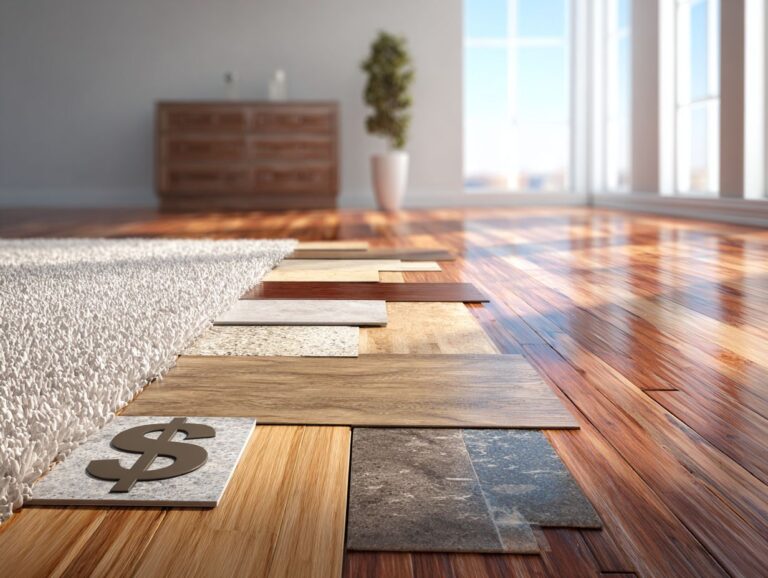
Cost Considerations
Knowing how much sanding costs can help homeowners decide between doing it themselves or hiring professionals.
A DIY sanding project typically costs between $50 and $150 for sandpaper, a sander, and dust collection. On the other hand, hiring a professional team usually costs between $1 and $2.50 per square foot, which is better for bigger spaces or for people who don’t have the skills.
For instance, refinishing a 400 sq. ft. room could cost $400 to $1,000 when hiring experts, while a DIY project remains under $150.
Choose sanding over other methods like chemical stripping for wood floors, which can be messier and take longer.
Limitations of Screening
Screening works well for small repairs, but it doesn’t handle deep scratches or major damage.
Effectiveness on Deep Scratches
Screening may not effectively address deep scratches, which can require more intensive refinishing methods to repair.
To evaluate scratches, first assess their depth. If a fingernail catches on the scratch, it indicates a deeper issue.
In such cases, transitioning to sanding with finer grits (starting at 120-150 grit) is essential. After sanding, progress to higher grits (220-400) for a smoother finish. Be sure to follow with a proper sealing process, using a wood finish that matches your surface.
Tools like an orbital sander can speed up the process, but hand sanding may give you better control over delicate areas.
Preparation Requirements
Proper preparation is essential before proceeding with screening, ensuring the floors are clean and free of debris.
- Start by thoroughly sweeping or vacuuming the floor to remove dust and dirt.
- Use a damp mop with a pH-neutral cleaner for stubborn spots, rinsing frequently to avoid residue buildup.
- After cleaning, inspect the surface for any blemishes or imperfections, which can be addressed with filler compounds.
- To maintain a dust-free environment, close windows and doors, and consider using an air purifier.
Focusing on cleanliness improves the screening process and leads to a smoother finish.
Limitations Based on Floor Condition

The state of your engineered hardwood greatly affects the refinishing process and possible results.
Water Damage
Water damage can cause wood to bend and change color, which makes it harder to refinish and sometimes impossible to fix.
Before refinishing, thoroughly inspect the surface for signs of water damage, such as soft spots or swelling. Use a moisture meter to check humidity levels; readings above 15% indicate potential issues.
If damage is found, dry the area completely-fans and dehumidifiers work well. For minor repairs, sand down warped areas until smooth, and apply wood filler for any deep cracks.
If there is a lot of damage, think about replacing the damaged boards before you refinish them to get a long-lasting result.
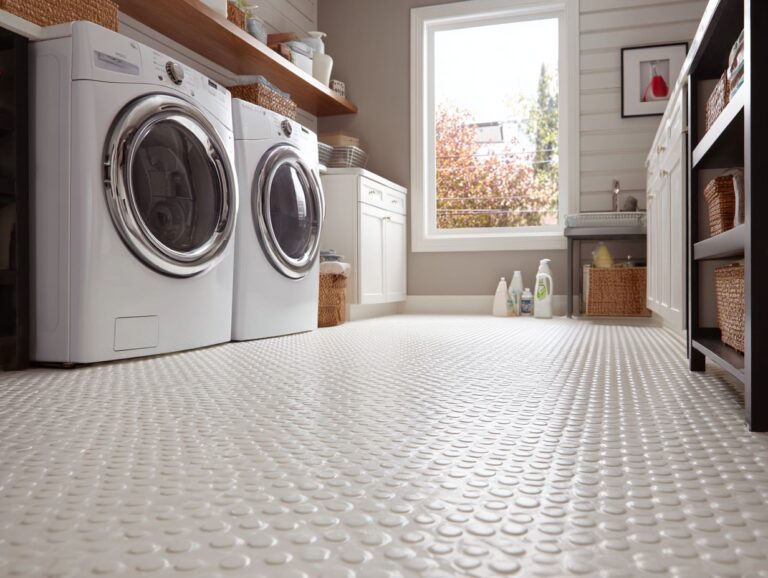
Excessive Wear and Tear
Excessive wear and tear may necessitate a full replacement rather than refinishing, particularly in high-traffic areas.
To assess the extent of wear, start by examining the surface for deep scratches, cracks, or significant discoloration. If the damage affects more than 30% of the area, consider replacing the flooring.
If the material has become uneven or lifted, options like engineered wood or luxury vinyl can provide durability and ease of maintenance.
Drag a heavy object over a sample area to measure how well it resists wear. When unsure, ask a flooring expert for specific advice on the best replacement choices.
Environmental Considerations
Conditions such as humidity and temperature can greatly affect how well refinishing choices work and how long they last. For instance, how these elements influence flooring can be seen in issues like hardwood floor cupping and crowning. Related insight: Hardwood Floor Cupping and Crowning – Causes and Fixes
Humidity and Temperature Effects
High humidity can cause wood to swell, while low humidity can lead to shrinkage, impacting the refinishing process.
To mitigate these effects, maintain a consistent indoor climate with a dehumidifier or humidifier, aiming for 30-50% humidity levels.
For refinishing, wait at least two weeks after a significant weather change before starting. This allows the wood to acclimate.
If you see rough spots while working, think about sanding and adding more finish to get a smooth look.
Monitoring temperature fluctuations in the environment will also help maintain the integrity of your engineered hardwood throughout its lifespan.
Indoor Air Quality Concerns
Certain finishes, like lacquers, can release VOCs that impact indoor air quality, necessitating safety precautions during refinishing.
To pick products with low VOCs, check for labels like Green Seal or GREENGUARD that confirm they release fewer emissions.
Water-based paints and finishes are generally preferable. For example, brands like Benjamin Moore’s Natura or Sherwin-Williams’ Zero VOC line offer eco-friendly options without compromising quality.
Before beginning the refinishing project, make sure there is good airflow by opening windows and using fans. Keep air purifiers running to filter out any airborne contaminants, helping to maintain optimal indoor air quality while you work.
Summary of Key Limitations
Key limitations include wear layer thickness, finish type, age of flooring, and specific environmental conditions that should be considered.
When refinishing hardwood floors, knowing these limitations is important.
For instance, a thinner wear layer may only support a few sandings before needing replacement, so ideally, look for at least 3mm thickness. Similarly, the finish type, whether oil-based or water-based, affects drying times and durability; oil-based finishes, while more durable, require longer drying periods.
Older floors may harbor hidden damage that surfaces during refinishing, so inspect thoroughly. Consider your environment-humidity and temperature can impact the finish’s adhesion.
Armed with this knowledge, you can make informed refinishing choices.
Engineered Hardwood Refinishing Data
Engineered Hardwood Refinishing Data
Refinishing Potential: Veneer Thickness and Refinishing
Refinishing Costs: Cost Range per Square Foot
The Engineered Hardwood Refinishing Data gives useful information on the possibilities and expenses involved in refinishing engineered hardwood floors. This information helps both homeowners and professionals make informed decisions about maintaining and extending the life of their flooring.
Refinishing Potential is primarily determined by the veneer thickness of the engineered hardwood. The recommended minimum veneer thickness for refinishing is 2.0mm. Floors with a veneer thinner than this are generally not suitable for refinishing, as the process could damage the underlying layers. On the other hand, a maximum veneer thickness of 6.0mm allows for multiple refinishes, significantly extending the life of the flooring. This range indicates that thicker veneers are more durable and offer greater flexibility for maintenance over time.
Refinishing Costs vary widely depending on the type of refinishing process chosen. Here is a breakdown of the costs per square foot:
- Engineered Wood: The cost of refinishing engineered wood is approximately $4.00 per square foot. This includes basic refinishing tasks customized for the exact needs of engineered hardwood.
- Basic Sanding: This is a simpler, more cost-effective method, priced at $1.75 per square foot. It involves sanding down the top layer to remove surface imperfections.
- Recoating: Recoating costs about $1.50 per square foot. This process involves applying a new layer of finish without sanding, suitable for floors with minor wear.
- Traditional Refinishing: This detailed approach costs about $5.50 per square foot. It includes sanding, staining, and applying multiple coats of finish, providing a thorough renewal of the floor.
- Dustless Refinishing: The most expensive option at $6.50 This method reduces dust during sanding with specific tools, making it cleaner and easier for homes that are lived in.
To sum up, the information on veneer thickness shows why it’s important to select engineered hardwood with the right thickness for later refinishing. The cost breakdown provides several options to match different budgets and refinishing requirements. Whether opting for basic sanding, recoating, traditional refinishing, or dustless refinishing, homeowners can select the method that best aligns with their maintenance goals and financial considerations.
Frequently Asked Questions
What is engineered hardwood?
Engineered hardwood is a type of flooring that is made up of multiple layers of wood veneer, with a top layer of hardwood. It looks like solid hardwood but is stronger and can be used in more ways.
Can engineered hardwood be refinished?
Yes, engineered hardwood can be refinished, but it is important to understand its limitations before attempting to refinish it.
What are the limitations of refinishing engineered hardwood?
Refinishing engineered hardwood is limited by the thickness of the top layer of hardwood. It can only be refinished a few times before the top layer becomes too thin and the flooring needs to be replaced. Some types of engineered hardwood cannot be refinished at all.
How do I know if my engineered hardwood can be refinished?
Check with the manufacturer or a professional flooring contractor to determine if your specific type of engineered hardwood can be refinished. Some types may have a thicker top layer of hardwood and therefore can be refinished more times than others.
What are the alternatives to refinishing engineered hardwood?
If your engineered hardwood cannot be refinished or has reached its limit for refinishing, there are a few alternatives. One option is to have the flooring professionally sanded and re-stained to improve its appearance. Another option is to cover the flooring with a new layer of engineered hardwood or another type of flooring.
How can I extend the lifespan of my engineered hardwood?
To extend the lifespan of your engineered hardwood, it is important to properly maintain and care for it. This includes regularly cleaning and protecting the flooring from scratches and wear. Picking a better-quality engineered hardwood with a thicker top layer can extend how long it lasts.