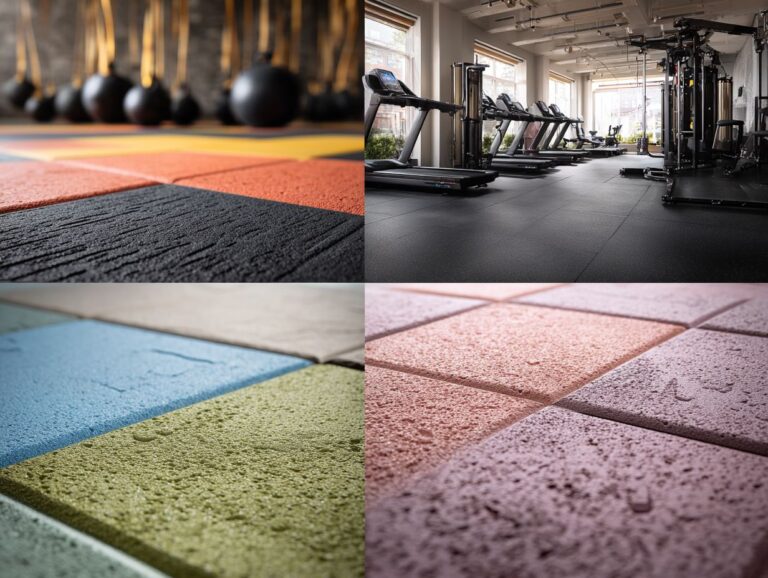
Diagonal Flooring Installation – Layout and Waste Factors
Changing your space with diagonal flooring installation can improve the look of your home, similar to the luxurious parquet flooring preferred by Marie Antoinette. This guide examines the details of a 4-3/4″ square block pattern, covering important points such as layout planning and material waste. Whether you’re someone who enjoys doing things yourself or an experienced installer, knowing these parts will help you achieve a perfect hardwood floor that lasts.
Key Takeaways:
Contents
- Diagonal Flooring Installation Statistics
- Planning Your Layout
- Calculating Material Requirements
- Preparing the Subfloor
- Installation Techniques
- Finishing Touches
- Common Mistakes to Avoid
- Frequently Asked Questions
- What is diagonal flooring installation?
- What are the benefits of diagonal flooring installation?
- What factors should I consider when planning for diagonal flooring installation?
- How does waste factor into diagonal flooring installation?
- What is the ideal waste percentage for diagonal flooring installation?
- Can I install diagonal flooring on my own or should I hire a professional?
Benefits of Diagonal Flooring
Diagonal flooring offers several advantages, like making spaces appear larger and enhancing their appearance, regardless of the room size.
Laying tiles or planks at a 45-degree angle can make a 10×10 room look much bigger. This layout also effectively masks imperfections in the subfloor, reducing the need for extensive repairs.
Styling is another benefit; diagonal patterns complement various aesthetics, from contemporary to traditional. For example, using wide planks in a living room can create an eye-catching center of attention, while smaller tiles in a hallway encourage movement and interest.
Diagonal Flooring Installation Statistics
Diagonal Flooring Installation Statistics
Flooring Patterns and Waste Estimates: Waste Estimates
Flooring Patterns and Waste Estimates: Room Sizes
The Diagonal Flooring Installation Statistics give information about how much waste is expected for various flooring designs and how room sizes affect the amount of material needed. This data is important for contractors and homeowners to plan well, save money, and reduce material waste during flooring installation.
Flooring Patterns and Waste Estimates offer a comparative analysis of waste generated by different installation styles. The straight pattern results in a 10% waste estimate, highlighting its efficiency and popularity for budget-conscious projects. This pattern involves aligning tiles or planks parallel to room walls, reducing cutting and material loss.
- Diagonal Pattern: With a 25% waste estimate, the diagonal pattern is aesthetically pleasing but less material-efficient. It involves angling tiles at 45 degrees to the walls, resulting in more cuts and offcuts, increasing waste and cost. However, many homeowners accept the higher waste because of its attractive look.
The Room Sizes data shows that the first room measures 300 square feet, while the second room is 160 square feet. Bigger rooms can highlight the beauty of diagonal patterns, but this also increases material waste. Careful planning is needed to control expenses. Smaller rooms might benefit more from straight patterns, reducing waste and installation complexity.
The decision to use straight or diagonal patterns affects waste and material expenses significantly. Room size further influences this decision, with larger areas potentially benefiting from the visual impact of diagonal installations despite higher waste. Thoughtful planning of these elements can improve material use and reach the wanted look in flooring projects.
Common Materials Used
Materials commonly used for diagonal flooring include hardwood, laminate, and vinyl planks, each offering unique styles and installation requirements.
Hardwood is known for being strong and welcoming, usually costing between $5 and $10 per square foot, which makes it a good choice for lasting value.
Laminate, a cost-effective alternative starting around $1-$3 per square foot, mimics the look of wood but requires careful installation to avoid warping.
Meanwhile, vinyl planks range from $2-$5 per square foot and are water-resistant, ideal for kitchens and bathrooms. For those considering unique flooring projects, such as in RVs or campers, the versatile nature of vinyl makes it a hidden gem. One of our most insightful guides offers a comprehensive look at flooring options for these spaces.
For diagonal installations, hardwood provides a classic feel, while laminate and vinyl are better suited for DIY enthusiasts, given their simpler installation processes and lower cost.
Planning Your Layout
Good planning is key for installing flooring at an angle. Start with exact measurements and a suitable layout plan to achieve accuracy.
Measuring the Space
Begin by using a measuring tape to find out the total square footage of your area. This helps make sure you cut correctly during installation.
Begin by measuring each wall, noting irregularities like angled corners or fixtures that could affect the dimensions.
For angled walls, use a T-square to draw a line from the corner to establish a straight edge. Mark the dimensions on a piece of paper for clarity.
Next, employ a chalk line for larger areas, snapping it to create straight reference lines that account for any obstructions. Don’t forget to double-check your measurements to avoid costly mistakes during your installation.
Choosing the Right Diagonal Angle
Choosing the right diagonal angle is important for improving how your flooring looks, usually between 30 and 45 degrees.
A diagonal angle creates a sense of movement and can make a room appear larger than it is. For example, a 30-degree angle usually gives a classic appearance, while a 45-degree angle gives a more lively look.
To apply this method, use a laser level to make sure your design is accurate and consistent. Consider the type of flooring-ceramic tiles and hardwood both react differently to diagonal placements.
Experiment with small areas first to visualize the effect before committing to a full installation.
Creating a Layout Plan
Develop a detailed layout plan by sketching the room dimensions and marking the direction of the planks, accounting for expansion gaps and directional changes.
To install easily, first check the room’s layout for any barriers such as doorways or built-in furniture.
Choose a focal point-perhaps a fireplace-to guide plank direction. Mark the starting line on the subfloor and maintain at least a inch gap from the walls for expansion.
For a strong and attractive look, place the planks in a way that no two planks of the same length are next to each other. This careful planning reduces waste and guarantees a polished result.
Calculating Material Requirements
Figuring out the materials you need makes sure you purchase enough flooring for your project, including some extra for any waste and the cuts typically needed for diagonal installations.
Estimating Square Footage
To estimate square footage, multiply the length and width of the space, adjusting for any areas that won’t be covered, like under cabinets or fixtures.
For example, a room measuring 10×12 feet would have a square footage of 120, calculated as 10 multiplied by 12. Similarly, a 15×20 room yields 300 square feet.
When dealing with odd-shaped areas or alcoves, break the space into smaller rectangles, calculate each separately, and then sum them. Remember to exclude areas occupied by fixtures when measuring to get an exact size.
This will help you make the most of all available space, resulting in improved design and flooring decisions.
Accounting for Waste Factors
When calculating material needs, include a waste factor of approximately 10-15% to cover mistakes and cutting allowances, particularly important in diagonal installations.
For example, if you’re covering a room of 200 square feet with tiles, you should add 20-30 square feet for waste, bringing your total to 220-230 square feet.
Measure waste differently depending on the material; for hardwood, consider the patterns and natural defects in the wood, which may require an additional 5-10%. Similarly, for carpet, the waste might differ based on the roll size and layout.
Always check with manufacturers for advice specific to their products.
Adjusting for Diagonal Cuts
Diagonal installations need accurate cuts, so change your material estimates to meet these specific needs.
For accurate diagonal cutting, use a circular saw or a jigsaw. Start by marking your material clearly with a straight edge, ensuring that the angle aligns with your design specifications.
For example, if you’re working with tiles, a 45-degree angle is common for corner installations. Next, double-check your measurements before cutting, as even minor errors can lead to material waste.
Think about using a miter saw for accurate cuts, especially on big jobs. By carefully planning your cuts, you can use your materials in the best way.
Preparing the Subfloor
Getting the subfloor ready is important for a successful diagonal flooring installation. This involves cleaning, leveling, and following specific material requirements.
Cleaning and Leveling the Surface
Begin the preparation by thoroughly cleaning the subfloor and leveling the surface to avoid any complications during installation.
- Start by removing all debris and dust using a vacuum or broom.
- Pay special attention to corners and edges where dirt often collects.
- If you notice any uneven areas, use a leveling compound; first, apply a primer to the subfloor for better adhesion.
- Afterward, spread the compound with a trowel, ensuring it’s smooth and consistent.
- To make sure the surface is level, use a leveling tool to check it from time to time.
This careful method makes sure your flooring installation is smooth and durable.
Installing Underlayment
Installing the underlayment is essential for sound absorption and moisture control, typically requiring a layer of foam or cushioning material.
Begin by rolling out the underlayment across the floor, ensuring it fits snugly within the room’s dimensions. Overlap seams by at least 8 inches to prevent moisture from seeping through, and secure them with a strong adhesive if needed.
Make sure to leave a 1/4-inch gap along the edges to allow for any movement or swelling. For best results, consider using high-density foam underlayment for superior sound reduction, especially in multi-story homes.
This process usually takes about 1-2 hours depending on room size.
Installation Techniques
Using efficient installation methods is important for a successful diagonal flooring project, paying attention to starting points and handling tricky cuts.
Starting Point and First Row
Begin your installation from a straight reference line, ensuring the first row of planks is perfectly aligned for a successful diagonal layout.
To create this straight reference line, use a chalk line to snap a straight mark along your installation area. Start by measuring the desired distance from a wall, then secure one end of the chalk line to that point.
Pull it taut to the opposite end and snap it to leave a clear line. Once marked, lay your first row of planks along this line, checking that they are level with a carpenter’s level.
For added security, use construction adhesive between the planks and the subfloor, ensuring durability and stability.
Continuing the Installation
Continue placing the planks, ensuring the joints are not aligned. This method makes the floor stronger and looks better.
To secure the planks effectively, start by laying one down, ensuring it’s aligned with the previous row’s end.
Use a tapping block to gently tap the planks into place without damaging them. Use nails or hidden fasteners to attach each plank, placing them 12-16 inches apart.
As you progress, remember to leave a 1/4-inch expansion gap around the perimeter to accommodate seasonal changes. Regularly use a level to check the alignment and make necessary changes to keep the surface smooth during installation.
Managing Cuts and Fitting
Managing cuts effectively is essential during installation, especially in diagonal layouts where angles can complicate fitting.
For accurate curve cutting, use a jigsaw as its blade handles tight turns well. A circular saw makes cutting straight lines quick and easy, allowing you to work with longer boards without trouble.
Always measure twice and mark your lines clearly before cutting. When fitting planks snugly, use a tapping block to gently persuade them together without damaging the edges.
Consider using spacers to maintain consistent gaps for expansion and contraction, preserving the integrity of your flooring over time.
Finishing Touches
Finishing tasks such as trimming and sealing are essential to protect your diagonal flooring and increase its durability.
Trimming and Molding Installation
Install trim and molding around the edges of your flooring to cover expansion gaps and create a polished finish that complements your design.
To choose the right trim style, consider the room’s overall aesthetic. For a modern look, go for clean, straight lines with baseboards around 5-7 inches high.
Measure the corners where the trim will meet and cut your pieces at a 45-degree angle for a seamless fit. When securing, use a nail gun for clean installation, or adhesive for easier placement.
Double-check measurements before cutting to prevent mistakes. Caulk along the edges for a perfect finish, filling any gaps and ensuring a professional appearance.
Sealing and Maintenance Tips
Once installed, seal your flooring and learn maintenance advice to keep it looking good and lasting longer.
To protect hardwood and laminate floors, consider sealants like polyurethane for hardwood, which provides a durable finish, or water-based poly for a quicker drying time. For laminate, choose a silicone sealant designed for flooring to prevent moisture damage.
For maintenance, clean your floors weekly with a microfiber mop and a pH-neutral cleanser. Quarterly, inspect for signs of wear and reapply sealant as needed to prolong freshness. This routine improves appearance and makes your flooring last longer.
Common Mistakes to Avoid
Preventing typical errors when installing diagonal flooring can conserve time and money, leading to a successful project from beginning to end.
Poor Measurements
One of the most frequent mistakes in flooring installation is poor measurements, leading to costly errors and wasted materials.
For exact measurements, use a reliable measuring tape or a laser tool that is accurate to 1/16 of an inch.
Always measure multiple times, particularly before cutting, as a small mistake can lead to misalignment. Double-check dimensions by measuring from different points-such as corners and wall edges-to confirm consistency.
Mark your measurements clearly on the material to avoid confusion during installation. By following these steps, you reduce the chance of expensive mistakes and make sure the installation goes smoothly.
Ignoring Waste Factors
Ignoring waste can result in not having enough materials, causing delays and higher costs for your installation.
To determine how much material you need, begin by figuring out the amount needed for your project. Next, apply a waste factor, usually 10-15%, depending on the material and project complexity.
For example, if you need 100 square feet of tiles and choose a 10% waste factor, calculate as follows:
- Total needed = 100 sq ft + (100 sq ft * 0.10) = 110 sq ft.
This approach guarantees you buy enough material to cover mistakes or damaged pieces, preventing extra expenses and delays from having to reorder.
Improper Installation Techniques
Using improper installation techniques can compromise the integrity of diagonal flooring, leading to issues such as buckling or uneven wear.
Common installation mistakes include neglecting expansion gaps, which can lead to wood expansion in humid conditions, and misaligning rows, resulting in an uneven appearance.
- To have a successful installation, leave at least a 1/4-inch gap around the edges and use spacers to keep rows straight during the process.
- Make sure your subfloor is even before installing the boards to prevent problems later.
By applying these recommended methods, you can improve the strength and look of your diagonal flooring.
Frequently Asked Questions
What is diagonal flooring installation?
Diagonal flooring installation is a technique where flooring boards are installed at a 45-degree angle, instead of the traditional parallel or perpendicular orientation. This creates a unique and visually appealing pattern on the floor.
What are the benefits of diagonal flooring installation?
Diagonal flooring installation can make a room appear larger and more spacious. It also adds a unique design element to the space and can be a great way to make a statement with your flooring. It can also cover any flaws in the subfloor.
What factors should I consider when planning for diagonal flooring installation?
Some things to think about are the room’s size and shape, the flooring material, and any unique features or design aspects in the area. Remember to include the waste percentage and the arrangement of the flooring boards for a smooth installation.
How does waste factor into diagonal flooring installation?
Due to the angled cutting and layout of diagonal flooring, there is typically a higher waste percentage compared to traditional flooring installation. Remember to account for this waste when buying materials to make sure you have enough for the project.
What is the ideal waste percentage for diagonal flooring installation?
The ideal waste percentage for diagonal flooring installation is typically between 10-15%. This allows for any mistakes or unforeseen issues during installation, as well as accounting for the angled cuts and layout of the flooring boards.
Can I install diagonal flooring on my own or should I hire a professional?
Laying diagonal flooring looks easy, but it needs accurate measurements and careful work to achieve a professional finish. It’s best to hire an expert for this type of installation to get the best results.