Hardwood Floor Refinishing Process – Start to Finish
Bring new life to your home with a complete guide to restoring hardwood floors! In this article, we’ll walk you through the entire process-from sanding hardwood floors to expertly applying the finish. With advice from experts like Mr Sander(r) and Barnum Floors in Des Moines, you’ll learn how to use wood filler properly and get great results. Prepare to make your hardwood floors the stunning focal point of your home!
Key Takeaways:
Contents
- Wood Floor Refinishing Market Statistics
- Preparing for the Refinishing Process
- Step-by-Step Refinishing Process
- Applying Stain and Finish
- Post-Refinishing Care
- Common Mistakes to Avoid
- Frequently Asked Questions
- What is the process for refinishing hardwood floors?
- How do I prepare my hardwood floors for refinishing?
- Can I refinish my hardwood floors myself?
- What types of finishes are available for hardwood floors?
- How long do I have to wait before walking on my newly refinished hardwood floors?
- How often should hardwood floors be refinished?
What is Hardwood Floor Refinishing?
Hardwood floor refinishing is the process of sanding and applying a new finish to restore the original beauty of hardwood floors.
This process typically involves three main steps.
- First, the hardwood surface is sanded down to remove old finishes and imperfections, using a drum sander for large areas and edge sanders for corners.
- Next, a stain is applied, offering a range of colors to suit your decor.
- A protective finish, like polyurethane, is used to increase strength and shine.
Each stage matters; sanding the floor correctly helps the stain and finish adhere, making the floor appear refreshed and protecting it for a long time.
Benefits of Refinishing Hardwood Floors
Refinishing hardwood floors can increase home value by up to 10%, providing a cost-effective upgrade.
This upgrade makes your floors look better with a new, clean style and also makes them last longer.
Homeowners often report a return on investment (ROI) of 50-80% when refinishing, according to Remodeling Magazine’s Cost vs. Value Report.
For example, a homeowner in Seattle refinished their 1,000 square foot living room and saw an increase in offers when they relisted their home. Refinishing mitigates wear and tear, preserving the beauty and integrity of your hardwood for years to come. To ensure your newly refinished floors maintain their durability and shine, explore our Hardwood Floor Cleaning Guide, which offers daily, weekly, and deep cleaning strategies.
Wood Floor Refinishing Market Statistics
Wood Floor Refinishing Market Statistics
To maintain the aesthetic appeal and durability of your flooring, it’s crucial to follow a comprehensive cleaning regimen. For those interested in more detailed guidance, our Hardwood Floor Cleaning – Daily, Weekly, Deep Clean Guide offers an extensive look into effective cleaning practices.
Market Growth and Trends: Market Value
The Wood Floor Refinishing Market Statistics provides helpful details about the economic trends and expected growth in this area. The data reveals the market’s present worth and forecasts its growth, matching common trends in home improvement and real estate investing.
Market Growth and Trends emphasizes a significant increase in market value from $0.75 billion in 2024 to a projected $1.0 billion by 2033. This growth indicates a compound annual growth rate (CAGR) that showcases the rising demand for wood floor refinishing services. As homeowners and commercial property managers focus on sustainability and aesthetics, refinishing offers a cost-effective and environmentally friendly solution.
- 2024 Market Value: The current valuation of $0.75 billion Highlights the importance of wood floor refinishing in home improvement. This shows a consistent demand due to the importance of keeping property value high and improving the look of interiors.
- 2033 Projected Market Value: The anticipated growth to $1.0 billion highlights a positive industry outlook. Factors contributing to this increase include advancements in refinishing technology, growing awareness of sustainable practices, and increased renovation activities.
The wood floor refinishing market is expected to grow due to the popularity of environmentally friendly home products and the demand for strong, long-lasting flooring. The expected increase shows chances for companies to create new ideas and broaden services, meeting changing customer choices.
The Wood Floor Refinishing Market Statistics highlights a positive outlook, shown by consistent market growth and the growing focus on eco-friendly practices and design in the home improvement sector.
When to Refinish Your Hardwood Floors
You should refinish hardwood floors every 7-10 years or when they show significant wear.
Look for signs like deep scratches or a dull surface that reflects light poorly. Discoloration, especially near windows, indicates UV damage.
To assess wear patterns, check high-traffic areas, which will show more signs of wear. Perform a moisture test by placing a few drops of water on the floor; if it absorbs quickly, it’s time to refinish.
Inspecting them regularly helps maintain their appearance and extends their lifespan. For an extensive analysis of wear issues, our comprehensive study on hardwood floor cupping and crowning provides insights into common problems and solutions.
Preparing for the Refinishing Process
Good preparation makes the refinishing process easier and produces better results.
Gathering Necessary Tools and Materials
Essential tools for refinishing hardwood floors include a drum sander, orbital sander, various sandpaper grits, wood filler, and a polyurethane finish.
Deciding whether to use a drum sander or an orbital sander is important. Drum sanders, like the Mr Sander(r) model (around $1,200), are powerful for aggressive material removal, ideal for large, flat areas.
In contrast, orbital sanders, such as the Festool ETS 150/3 (approximately $400), offer a gentler touch for detailed work, perfect for edges and corners.
For sandpaper, start with 60-grit for rough surfaces and progress to 120-grit for a smooth finish.
A reliable wood filler, such as Minwax(r) Wood Filler ($10), fills gaps well, and a strong polyurethane finish makes it last longer.
Clearing the Area
Moving furniture and other items out of the way is important for a safe and smooth refinishing process.
Start by removing furniture piece by piece. If possible, disassemble larger items like tables and sofas to do this safely.
Place protective felt pads under any remaining items to avoid scratches on the floor.
For storage, use a specific room or garage, covering fragile items with moving blankets to keep them safe from harm.
Clearing the space reduces the risk of accidents and lets you check for any repairs needed before beginning the refinishing process.
Assessing the Condition of the Floor
Assessing the condition of your hardwood floor involves checking for gaps, holes, and overall surface wear.
- Start by inspecting for gaps or holes; use a flashlight to highlight these issues. If your floor exhibits surface damage, like scratches or dullness, note those areas for refinishing later.
- Identify the type of wood; for instance, oak requires different treatment than maple. Once you’ve documented your findings, you can use wood filler to address gaps before sanding.
- Choose a filler that matches your floor’s color, apply it smoothly with a putty knife, and allow it to cure before proceeding with the refinishing process.
Step-by-Step Refinishing Process
Restoring hardwood requires several important steps to create a long-lasting and attractive surface. For a deeper understanding of the materials involved, consider exploring our guide comparing engineered vs solid hardwood and their unique properties.
Sanding the Floors
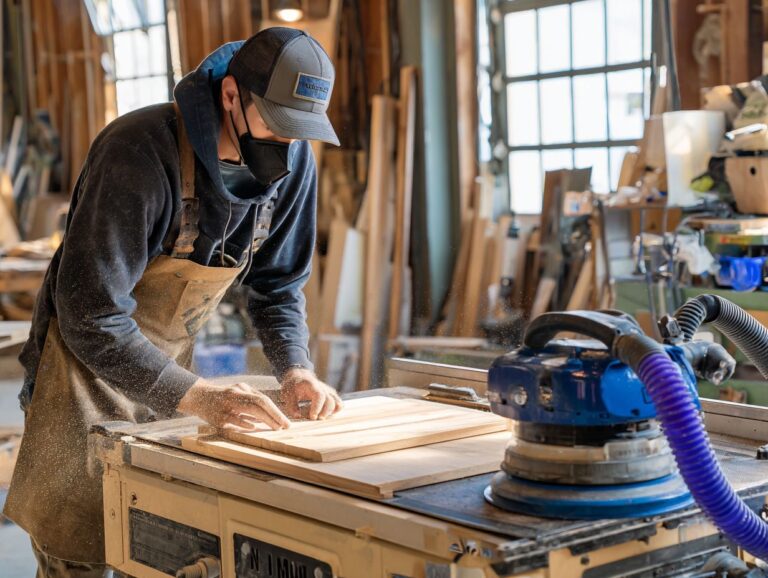
Sanding the floors is the first major step in refinishing, using either a drum sander or an orbital sander to remove the old finish.
- Begin with a coarse 36-grit sandpaper to remove the existing finish effectively. If using a drum sander, move it in a straight line across the boards, overlapping each pass slightly to avoid swirl marks.
- Transition to a finer 60-grit paper for smoothing out imperfections, followed by an 80 or 120-grit for a truly polished surface. If you prefer an orbital sander, use a similar grit progression, but remember it may take longer due to its less aggressive nature.
- Always remember to vacuum after changing grit for optimal results.
Choosing the Right Grit Sandpaper
Selecting the right grit sandpaper is essential for effective sanding; start with 36 grit for heavy sanding and finish with 120 grit for a smooth surface.
Between these two, use 60 grit for initial shaping and 80 grit for removing deeper scratches. Move through these grits step by step-do not skip more than one grit at once.
For instance, if you jump directly from 36 to 120, you’ll likely leave visible imperfections. Always sand in the direction of the grain and periodically wipe the surface to check smoothness.
This method improves the finish and makes your tools last longer since each grit is most effective within its particular range.
Using a Floor Sander
Using a floor sander correctly is important for refinishing work; using it wrong can lead to uneven floors.
To get a smooth surface, begin with the roughest sandpaper, like 36 or 40 grit, to take off old finishes and even out rough areas. Maintain a consistent speed, moving across the surface in straight lines while slightly overlapping each pass to prevent low spots.
For the final finish, switch to finer grits like 120 or 150. Safety steps are important; use a dust mask and goggles to keep yourself safe from dangerous particles. Make sure the room has good airflow to reduce breathing in fumes from finishes.
Vacuuming and Cleaning the Dust
After sanding, vacuuming and cleaning the dust is critical to prepare the floor for staining and finishing.
For a complete cleanup, use a HEPA vacuum. It catches small dust particles that regular vacuums might let back into the air.
Begin by vacuuming the entire area in sections, ensuring you pay close attention to corners and edges where dust tends to accumulate.
Follow up with a damp microfiber cloth to pick up any remaining particles.
For optimal results, allow the floor to dry completely before applying any stains or finishes to achieve a smooth, even appearance.
Applying Stain and Finish
Putting on the stain and finish is an important step in refinishing because it decides how the floor will look and how long it will last.
Choosing the Right Stain Color
Selecting the right stain color can dramatically change the appearance of hardwood floors, with popular options ranging from natural oak to deep walnut.
When choosing a stain, consider the wood type; lighter woods like maple absorb stain differently than darker types like mahogany.
Think about the room’s ambiance: for a cozy feel, darker stains such as espresso or ebony can add warmth, while lighter stains like honey or natural provide an airy, spacious look.
To help you choose, test different stains on spare pieces of wood that are similar to your floor. This approach allows you to see how each color interacts with your space’s lighting at different times of day.
Applying the Stain
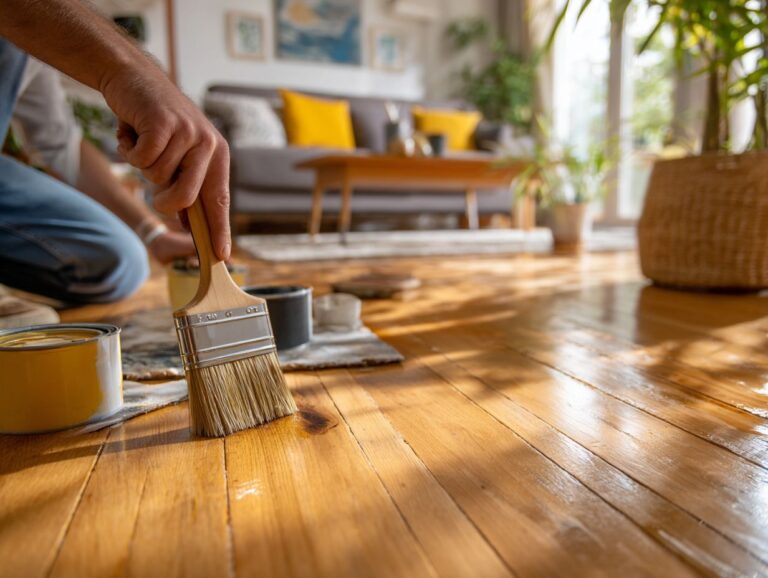
It’s important to apply the stain evenly; use a good brush or cloth and work in small areas to prevent lap marks.
- Start by cleaning the surface with a mild detergent and water, and allow it to dry completely.
- Choose a high-quality oil or water-based stain; Minwax and Varathane are popular options.
- Put the stain on in the direction of the wood’s lines, using long strokes that overlap to cover the surface evenly.
- Allow the stain to sit for 5-15 minutes for deeper color absorption, then wipe off excess with a clean rag.
- Let the stained surface dry for 24 hours before applying a protective finish, and always wear a respirator for safety.
Types of Finish Options
Choosing the right finish type, such as oil-modified urethanes or hard wax oils, significantly affects durability and maintenance.
Oil-modified urethanes are strong, making them ideal for areas with heavy foot traffic. They offer a glossy finish and are relatively easy to apply, usually drying within 24 hours.
In contrast, hard wax oils give surfaces a natural appearance and texture. However, they require more regular maintenance, so they are better suited for areas with lower foot traffic.
When choosing, think about your lifestyle: if you have pets or young children, a stronger oil-modified urethane might be the best option. A hard wax oil is better for those who want a nice look with less damage over time.
Applying the Finish Coat
Make sure the first coat is dry before adding more layers; pay close attention to detail when applying the final coat.
For optimal durability, apply two to three thin coats of finish. Use a high-quality brush or foam applicator to minimize bubbles.
Dip the brush lightly and make smooth, even strokes, starting from one edge and proceeding to the opposite side. If bubbles form, simply brush them out gently. It’s also helpful to work in a well-ventilated area to reduce humidity, which can contribute to uneven application.
Allow each coat to dry completely before sanding lightly between layers for a polished look.
Post-Refinishing Care
Looking after your hardwood floors after refinishing helps them stay attractive and last longer.
Allowing Time to Cure
Allowing the finish to cure properly is critical; most finishes require at least 24-48 hours before foot traffic.
The curing process varies based on the type of finish used. For instance, oil-based finishes typically take 24-48 hours to dry and may require up to 30 days to fully cure, while water-based finishes usually cure within 2-4 hours for foot traffic and take about a week for complete hardness.
Having good airflow is important right now. Open windows and use fans to help things dry faster and stop smells from lingering.
Checking the temperature is important; keeping it between 65-75 degreesF (18-24 degreesC) will provide the best conditions for curing.
Cleaning and Maintenance Tips
Regular cleaning and maintenance can preserve the beauty of your refinished hardwood floors for years to come.
To keep your floors in top condition, use a microfiber mop weekly to trap dust and dirt, and avoid harsh cleaners that can damage the finish.
For deep cleaning, opt for a pH-neutral cleaner like Bona Hardwood Floor Cleaner. Place felt pads under furniture legs to prevent scratches.
Clean the floor daily with a broom or vacuum to remove dirt. Consider applying a new coat of finish every few years, depending on how often the area is used.
With these steps, you can maintain the luster and longevity of your investment.
Common Mistakes to Avoid
Steering clear of typical errors during refinishing can save you time, effort, and money while giving you a high-quality result.
Skipping the Sanding Process
A frequent mistake is skipping the sanding process, which can lead to poor adhesion of stain and finish.
To avoid this, create a thorough sanding checklist before starting your project. This should include:
- Ensuring all surfaces are dust-free
- Sanding with varying grits (starting with coarser 80-grit and finishing with 220-grit)
- Checking for any missed spots through light inspection
Set realistic timelines to add sanding into your workflow without rushing; allocate at least an extra day for this step, especially for larger projects. By focusing on this process, you improve the strength and look of your completed work.
Using the Wrong Products
Using the wrong products can lead to disastrous results; always select high-quality stains and finishes recommended by professionals.
Common products to avoid include:
- Cheap varnishes, which can yellow over time
- Low-quality stains that fade quickly
Instead, opt for trusted brands such as Barnum Floors’ polyurethane finishes, known for their durability and non-yellowing properties. Also, consider Titebond wood glues for a strong bond and Varathane for exceptional clarity in finishes.
To get the best outcome, always try the product on a small spot first to make sure it improves the look of your wood without causing any harm.
Frequently Asked Questions
What is the process for refinishing hardwood floors?
The process for refinishing hardwood floors involves sanding down the old finish, filling in gaps and cracks, and applying a new finish to the wood. It can take anywhere from 3-5 days to complete depending on the size of the floor and the condition of the wood.
How do I prepare my hardwood floors for refinishing?
Prior to refinishing, it is important to remove all furniture and rugs from the room. Clean the floors thoroughly and make any necessary repairs, such as fixing loose boards or filling in gaps. It is also recommended to cover vents and doorways to prevent dust from spreading to other areas of the house.
Can I refinish my hardwood floors myself?
While it is possible to refinish hardwood floors on your own, it is a labor-intensive and time-consuming process. It also requires specialized tools and equipment. It is recommended to hire a professional for the best results.
What types of finishes are available for hardwood floors?
Different finishes for hardwood floors include oil-based, water-based, and wax options. Each type has its own advantages and disadvantages, so it is important to consider factors such as durability, maintenance, and appearance when choosing a finish.
How long do I have to wait before walking on my newly refinished hardwood floors?
The amount of time you should wait before walking on your newly refinished hardwood floors depends on the type of finish used. Water-based finishes typically dry in 1-2 hours, while oil-based finishes can take up to 24 hours to dry. Wait at least 24 hours before walking on the floors to make sure the finish has dried completely.
How often should hardwood floors be refinished?
How often you need to refinish hardwood floors varies based on factors like the finish type, how much the floor is walked on, and how well it is cared for. Hardwood floors usually need to be refinished every 3-5 years to keep them looking good and to prevent damage.
