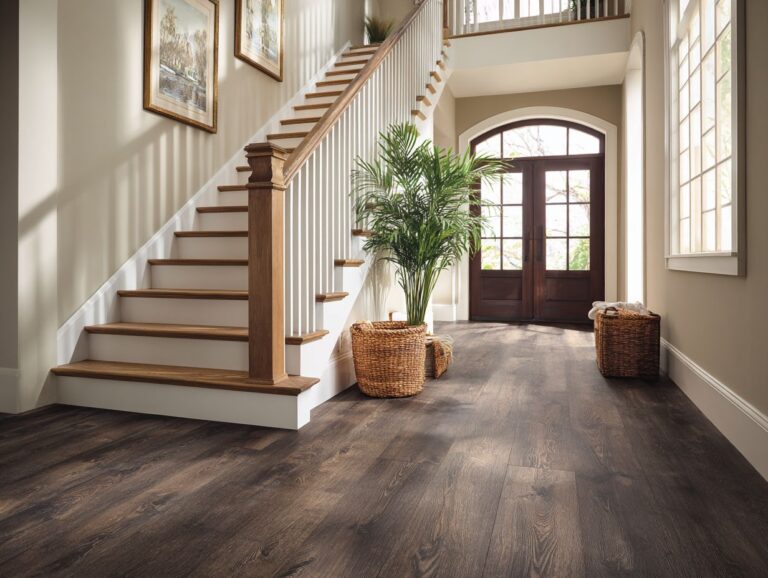
Herringbone and Chevron Pattern Installation Guide
Change your space with beautiful herringbone or chevron floor patterns! In this detailed guide by Charles Peterson, we’ll take you through each step to install a stunning hardwood floor. With practical advice on using a flooring nailer correctly, you’ll learn the installation method and get a polished result. Get ready to add elegance to your home while enhancing your flooring skills!
Key Takeaways:
Contents
- What are Herringbone and Chevron Patterns?
- History and Origin
- Differences Between Herringbone and Chevron
- Herringbone vs. Chevron Flooring Statistics
- Materials Needed for Installation
- Preparing the Installation Area
- Design Planning
- Installation Steps
- Finishing Touches
- Frequently Asked Questions
- What is the difference between a herringbone and chevron pattern?
- Which pattern is easier to install, herringbone or chevron?
- Do I need any special tools for installing a herringbone or chevron pattern?
- Can I use any type of tile or plank for a herringbone or chevron pattern?
- What are some tips for achieving a professional-looking installation of herringbone or chevron patterns?
- Can I use a herringbone or chevron pattern on walls or in other areas besides floors?
What are Herringbone and Chevron Patterns?
Herringbone patterns consist of rectangular wooden planks arranged in a zigzag effect, while chevron patterns feature planks cut at an angle, allowing for a continuous V-shape appearance.
The herringbone pattern’s staggered layout gives a traditional appearance, ideal for classic or rustic interiors, while chevron gives a modern and energetic look.
To decide between the two, consider the software tools for design planning. For example, SketchUp can show the design, while measuring tools like a laser distance measurer make sure the installation is accurate.
When you choose your pattern, factor in the surrounding decor – herringbone blends well with vintage furnishings, whereas chevron might complement contemporary minimalist designs better, creating a coherent aesthetic throughout the space. For inspired ideas on creating a cohesive look, see also: Loft and Studio Apartment Flooring Ideas.
History and Origin
The herringbone pattern dates back to ancient Rome, while the chevron pattern gained popularity in 19th-century France, showcasing a rich history in flooring aesthetics.
The herringbone design is characterized by its distinctive V-shaped layout, which creates a sense of movement and elegance.
Unlike other designs, the chevron pattern has uninterrupted zigzag lines, giving it a stronger and more noticeable appearance. Notably, Charles Peterson’s work in the early 20th century highlighted the revival of these patterns in modern contexts.
By the late 1800s, the chevron pattern began to appear in French parquet flooring, symbolizing luxury and sophistication. Both patterns can improve interior spaces, often used in places like art galleries or luxury stores.
Differences Between Herringbone and Chevron
Herringbone and chevron patterns both create striking visuals, but they differ in the angle of the cuts and their arrangement, which influences how they are installed and look.
Herringbone is a design with a zig-zag pattern created by placing rectangular tiles at right angles. It works well in small areas where an energetic appearance is wanted.
In contrast, chevron uses slanted tiles that meet at a point, adding a sense of movement and flow to larger areas.
For installation, both styles need careful work. Herringbone could be easier for beginners because it can cover up small errors, whereas chevron needs exact measurements and cuts for a neat appearance.
Consider the space’s size and style when choosing between them.
Herringbone vs. Chevron Flooring Statistics
Herringbone vs. Chevron Flooring Statistics
Herringbone and Chevron Flooring: Flooring Preferences
Herringbone and Chevron Flooring: Cost and Labor
The data on Herringbone vs. Chevron Flooring Statistics gives details about what customers like and how much it costs to install these common flooring designs. As the dataset indicates, both Herringbone and Chevron patterns share equal popularity, each capturing 50% of the preference among consumers. This equilibrium suggests that both patterns are equally appealing to homeowners and designers, likely due to their aesthetic qualities and the unique visual impact they bring to a space.
Cost and Labor considerations highlight differences in installation expenses. The Chevron pattern incurs a 15% increase in installation costs compared to standard flooring setups. This is because aligning the V-shaped pattern needs careful work and extra time from experienced workers. In contrast, the Herringbone pattern shows a 10% increase in installation costs. While also requiring careful installation, the rectangular arrangement of Herringbone might be less complex than Chevron, explaining the slightly lower cost increase.
The equal popularity of both patterns suggests a balanced market demand, with choice often dictated by personal style preference or existing interior design themes. People who choose Chevron might like its lively and guiding look, while fans of Herringbone might prefer its traditional and lasting style.
In the end, choosing between Herringbone and Chevron might depend on how much you want to spend, as they have different installation costs. Consumers and designers must weigh the aesthetic benefits against the financial implications, especially if the installation area is extensive. This data shows why it’s important to think about both looks and price when choosing flooring, so that it fits your taste and budget.
Materials Needed for Installation
Installing herringbone or chevron patterns requires particular materials and tools suited for the detailed design.
Types of Flooring Materials
Popular choices for herringbone and chevron patterns include solid hardwood, engineered wood, and plywood, each offering unique benefits suited for different environments.
Solid hardwood (cost: $5-$15/sq ft) delivers unmatched durability and elegance, ideal for high-traffic areas.
Engineered wood flooring ($3-$10/sq ft) is a practical choice for areas prone to moisture, like basements and kitchens.
Plywood, while more affordable ($1-$5/sq ft), may not provide the same aesthetic appeal but works well for temporary projects.
For residential living areas, solid hardwood is recommended, while engineered wood is better for environments prone to humidity.
Think about the cost, purpose, and how simple it is to set up when choosing.
Tools Required
Key tools for laying herringbone or chevron patterns are a flooring nailer, miter saw, circular saw, and rubber mallet. These tools guarantee accurate cutting and proper installation.
A flooring nailer, which typically costs around $150, secures boards tightly, while a miter saw (around $200) is used to make exact angled cuts for specific designs.
A circular saw, priced around $100, easily cuts large pieces of flooring material in straight lines. A rubber mallet, usually under $20, helps gently tap pieces into alignment without damaging the surface.
Using these tools will make installation quicker and help you complete your work with a professional look.
Adhesives and Finishes
Choosing the proper adhesives and finishes is important. Use wood glue for joining pieces and sealants to keep moisture out.
For effective results, consider Titebond III wood glue ($15/gal) for interior projects, as it offers excellent strength and water resistance.
For outdoor applications, use a polyurethane sealant like Rust-Oleum Watco ($30/gal), designed to withstand harsh weather.
When choosing finishes, opt for a water-based polyurethane for hardwood floors due to its quick drying time and low odor. Each product’s suitability will depend on your specific flooring type and environmental conditions, ensuring durability and aesthetic appeal.
Preparing the Installation Area
For a good installation, you need to get the area ready. This requires exact measurement, getting the surface ready, and making sure the materials fit the area.
Measuring the Space
Accurate measurements are needed. Start by measuring the room’s length and width, ensuring you have enough room for the pattern.
Use a chalk line to make straight lines and accuracy. Mark the center of the room and measure from that point outwards, adjusting for any fixtures like outlets or vents.
Always account for these features in your layout to avoid complications later. Add 10% to your total measurements to cover any waste or miscalculations during installation.
This method saves time and gives a neat and professional result as you work.
Surface Preparation
Make sure the surface is clean and dry. Take away any old flooring or trash, and check for moisture to stop any damage later.
- Start by thoroughly sweeping or vacuuming the area to remove dirt and dust.
- Next, use a cleaning solution suitable for the surface type, such as a pH-neutral cleaner for wood or tile, scrubbing firmly but carefully.
After cleaning, use a moisture meter to assess the area; levels should ideally be below 12% to avoid mold or adhesive issues.
Common pitfalls include neglecting to allow the surface to dry fully and overlooking hard-to-reach corners, both of which can lead to significant problems once new flooring is installed.
Acclimating the Materials
Let the hardwood flooring materials sit in the room for at least 72 hours before installing them. This helps the wood get used to the humidity in the area.
During this acclimation period, place the unopened boxes of wood in the room where they will be installed.
Ideally, the temperature should be between 60 degreesF and 80 degreesF with a humidity level of 30-50%. Use a hygrometer to monitor conditions.
If discrepancies arise, consider using a dehumidifier or humidifier to stabilize the environment.
Once acclimated, this process helps prevent issues like warping or gaps in the flooring after installation, ensuring a more durable and aesthetically pleasing result.
Design Planning
Careful planning of the design sets the foundation for a unified look, bringing together patterns, colors, and layout decisions. To address the challenges in maintaining continuity in complex spaces, such as split-level homes, our elaboration on split-level flooring challenges provides practical insights.
Choosing the Right Pattern
Factors such as room size and design style significantly influence the choice between herringbone and chevron patterns, each offering distinct visual effects.
In small rooms, the herringbone pattern can make the space look bigger by guiding the eye along a narrow path.
Conversely, chevron patterns bring life and activity to larger areas, as their strong angles can liven up the room.
When deciding, think about your current furniture and color scheme. For example, a simple herringbone pattern complements traditional dcor, while chevron adds a lively touch to a modern style.
You can find visual samples on design websites such as Houzz or Pinterest to get ideas suited to your area.
Color and Texture Considerations
Color and texture are important for improving the look and feel of flooring. Choices include natural wood shades and bright colors.
Selecting the right colors and textures requires careful consideration of your existing decor. Start by evaluating your room’s primary color palette.
For instance, if you have earthy tones, consider warm woods like oak or walnut to create harmony. Tools like the Sherwin-Williams color wheel can help visualize how different shades interact.
Don’t forget to consider texture; a matte finish complements modern styles, while gloss adds sophistication. Try out different samples in the area to observe how light changes the look before deciding.
Creating a Layout Plan
Creating a layout plan includes marking the center of the room and measuring slat lengths to make sure the installation is balanced and looks good.
- First, use a trammel compass to draw arcs that set the angles for your slats; make sure you change them to fit the size of the room.
- Next, measure and cut slats to the predetermined lengths, marking each one clearly. To be more exact, use painter’s tape to mark where each slat will be placed. This helps you see the spacing.
- Secure the slats in place, checking alignment frequently to maintain symmetry throughout the entire installation process.
- By following these steps, your layout will look good and be well-organized.
Installation Steps
Following the installation steps closely leads to a successful outcome, from marking the starting point to putting in the last slats.
Marking the Starting Point
- Begin the installation by marking the centerline of the room with a chalk line, establishing the starting point for the herringbone or chevron pattern.
-
To make sure the centerline is at a right angle to the walls, measure from each corner of the room diagonally to the centerline. Adjust as necessary until both measurements are equal.
-
Using a laser level helps improve accuracy; place it along the walls to show an exact line and check your measurements.
-
Once satisfied, snap your chalk line, allowing you to start your flooring pattern with confidence. This method is accurate and efficient, reducing the likelihood of errors over time.
Cutting the Material
Cut the wooden planks accurately so they fit together well. Use a miter saw or circular saw to get the right angles.
Before you start cutting, always wear safety goggles and earmuffs to protect against debris and noise.
Measure the required lengths carefully, marking them with a pencil. To get the right angles, set the miter saw to the degree you need for your work. Make sure the blade is in good condition for clean cuts.
When cutting slats, place the wood securely against the fence and hold it steady during the cut. To minimize waste, plan your cuts to maximize use of larger pieces, cutting smaller pieces from the remaining lengths.
Applying Adhesive
Spreading glue evenly is important for a strong hold and to avoid moisture problems later on, so picking the right glue matters too.
To achieve a uniform adhesive layer, start with a notched trowel, priced around $10, to spread the glue evenly across the surface.
Use a straight edge to confirm the adhesive layer’s thickness matches the manufacturer’s recommendations.
For big projects, think about using a roller applicator. It can help you cover more area and make the job faster.
Always apply the adhesive in a well-ventilated area, and give it sufficient time to set according to package instructions, ensuring optimal strength and durability.
Placing the First Row
Laying the first row of wooden planks is important for the whole installation. Make sure it lines up exactly with the marked centerline.
- Begin by positioning your first plank along the centerline, using spacers to maintain consistent gaps for expansion.
- Check the alignment with a level, ensuring it’s straight before fastening it down.
- If adjustments are needed, gently tap the planks with a rubber mallet to achieve a snug fit without damaging the wood.
- After securing the first plank, continue with the next, repeating the alignment and fastening process.
This careful method will establish a solid base for your entire flooring project.
Continuing the Pattern
Once the first row is in place, continue the pattern methodically, ensuring alignment and proper installation of each subsequent row without gaps.
To keep things accurate, use a laser level to measure the height of each row and make changes if necessary. When placing each plank, make sure to arrange the joints so they do not line up, by at least six inches, to improve the look and strength.
For tighter corners, consider utilizing flooring splines to create a snug fit, preventing gaps and adding support. Secure the ends of the rows with a finishing nail to prevent any shifting over time, which will keep your floor looking pristine for years.
Finishing Touches
Completing the installation with trimming and edging gives a neat look, and regular care extends the lifespan of your new flooring.
Trimming and Edging
Trimming edges and attaching feature strips gives the flooring a clean finish, while hiding expansion gaps and providing a polished transition to adjacent surfaces.
To achieve a professional look, start by measuring the perimeter of the room and cutting your trim pieces to size using a miter saw, which typically costs around $150.
For seamless edges, consider using a hybrid adhesive like construction adhesive for a strong bond. Make sure to apply a caulking gun to fill any gaps, ensuring a tight fit.
Finish with wood filler for a smooth surface; this improves the look and makes the flooring last longer.
Cleaning and Maintenance
Regular cleaning and maintenance are essential to preserving the beauty and longevity of herringbone or chevron flooring, requiring specific techniques to prevent moisture damage.
Start by using a microfiber mop ($15) for regular sweeping to remove dust and debris without scratching the surface.
When mopping, always use a pH-balanced cleaning solution that’s safe for wood to avoid damage; popular options include:
- Bona Hardwood Floor Cleaner ($12)
- Method Squirt + Mop ($7)
It’s important to avoid too much water, as still moisture can damage the wood.
Create a biweekly schedule for deeper cleaning, ensuring to check for scuffs or stains, which you can treat with a wood-specific wax or repair kit.
Frequently Asked Questions
What is the difference between a herringbone and chevron pattern?
The herringbone pattern is created by laying rectangular tiles or planks at a 90 degree angle, creating a zigzag effect. The chevron pattern, on the other hand, is created by laying rectangular tiles or planks at a 45 degree angle, creating a continuous V shape.
Which pattern is easier to install, herringbone or chevron?
Both patterns require specific techniques and attention to detail, so neither is significantly easier to install than the other. Some people might find the chevron pattern challenging because it requires angled cuts and exact placement.
Do I need any special tools for installing a herringbone or chevron pattern?
Both patterns can be installed using standard tile or flooring installation tools. You might need a tile cutter or saw for certain cuts, and a T-square or laser level for accurate measurements and alignment.
Can I use any type of tile or plank for a herringbone or chevron pattern?
Both patterns can be created using a variety of materials, such as ceramic, porcelain, natural stone, or wood. Just make sure the tiles or planks are the same size and thickness for a uniform look.
What are some tips for achieving a professional-looking installation of herringbone or chevron patterns?
Begin with a smooth and even subfloor. Arrange the pattern first to check for balance and prevent unexpected issues during installation. Use spacers to maintain consistent grout lines, and take your time with cuts and alignment for a polished end result.
Can I use a herringbone or chevron pattern on walls or in other areas besides floors?
Absolutely! Both patterns can be used on walls, backsplashes, or even in more unconventional areas such as fireplace surrounds or accent walls. Just make sure the surface is properly prepared and the appropriate adhesive and grout is used.